Old-Fashioned Oregon Marionberry Pie Recipe
This website uses affiliate links which may earn commission at no extra cost you.
Nothing says Oregon like a classic marionberry pie. This iconic dessert is made with sweet, juicy marionberries, a unique blackberry variety developed in Oregon, and baked into a flaky, golden crust. Whether you’ve had it on the coast or are making it at home for the first time, this homemade marionberry pie recipe captures the perfect balance of tart and sweet. Using fresh or frozen marionberries, it’s a must-try Oregon berry pie that brings the Pacific Northwest straight to your kitchen. Want to take this already amazing pie up a notch? Add some homemade or store-bought vanilla ice cream to a warm slice of this marionberry pie!

Marionberry History
I think it is super important to learn the history behind marionberries and why they are considered the “king” of the blackberry family. To start, blackberries belong to the Rubus genus (part of the rose family), and there are hundreds of species and hybrids worldwide. Now, marionberries are a specific type of blackberry cultivar that was developed in Oregon (a cross between ‘Chehalem’ and ‘Olallie’ blackberries). They thrive in Oregon’s mild, damp climate and long summer days, which is why they’re almost exclusively grown there. In the 1940s, plant breeders at Oregon State University and the USDA began crossing blackberry varieties. They combined the ‘Olallie’ (blackberry × loganberry cross) with the ‘Chehalem’ (blackberry × raspberry cross). The result was the marionberry, named after Marion County, Oregon, where it was first extensively tested. The marionberry was officially released in 1956 in Oregon, and by the 1960s, it became the dominant blackberry grown in Oregon. Today, Oregon produces over 90% of the world’s marionberries. Isn’t that crazy??
Ingredient sourcing
Now I usually don’t like to skimp on ingredients for any of my recipes so I like to recommend getting the best ingredients that you can find for yourself! Now what I mean by this is getting your ingredients as local as you possibly can. For example, whenever I can, I like to get my eggs from a neighbor who happens to have chickens. Farm fresh local eggs are ten times better than store bought, and I can say that with no doubt in my mind because my family used to own chickens and we’d have farm fresh eggs all the time! Now I know this recipe doesn’t call for eggs, getting fresh local eggs was just one of my usual suggestions. One example for this recipe would be to get your marionberries directly from growers in Oregon or Washington. You are guaranteed to get the best ingredients when you source from growers you research and growers that know what they’re doing, directly from the pacific northwest. Now I live in Illinois, and with marionberries almost exclusively grown in Oregon, I had to look up many different growers based in Oregon to find where I should source my marionberries. I ordered my frozen marionberries and within two days they were at my doorstep!
Now if you live in Oregon and even Washington you have a better chance of getting fresh harvested marionberries than the rest of us. So, if you do, I’d highly recommend you get some fresh marionberries and make the best marionberry pie! (I’m jealous of you if you live in Oregon :/ )
Homemade Pie Crust
Making pie crust from scratch is 110% worth it because the flavor and texture is unmatched compared to store-bought, with homemade pie crust coming out buttery, flaky, and tender. This perfectly complements any filling you decide to choose. You also have full control over the ingredients, meaning no unnecessary preservatives and the ability to adjust for taste or dietary needs. Not to mention, once you get the hang of it, it’s surprisingly simple, and the sense of pride you get when you slice into a pie made entirely by hand is unbeatable.
three major don’ts when making pie crust
Don’t overwork the dough – It’ll get tough instead of flaky.
Don’t use warm ingredients – Butter and water should be cold to keep the crust tender.
Don’t skip chilling the dough – Resting prevents shrinkage and helps flakiness.

two major don’ts when making pie filling
Don’t overfill the pie – It’ll bubble over - (No one wants that!)
Don’t add raw fruit without a thickener – Use cornstarch, flour, or tapioca to avoid a runny filling.
General pie baking don’ts
Don’t forget an egg wash if you have a top crust (if desired) – No egg wash = a pale and dull crust.
Don’t underbake – The crust needs time to brown and crisp, especially the bottom.
Don’t overbake - Fruit fillings with thicken too much, and the pie crust will burn.
Marionberry Pie Storing Options
Room Temperature (1–2 days):
Cover loosely with foil or plastic wrap and store at room temperature for up to 2 days.
Refrigerator (3–4 days):
Best option: Cover tightly with plastic wrap or aluminum foil and refrigerate.
This helps to keep the crust from getting soggy and preserves freshness.
Freezer (Up to 3 months):
Let the pie cool completely.
Wrap tightly in plastic wrap, then in foil, or place in a freezer-safe container.
To serve: thaw overnight in the fridge, then reheat in a 350°F oven for 15–20 minutes.
serving tips
1. Let It Cool First
Allow the pie to cool completely for at least 2–4 hours after baking.
This helps the filling set, making it easier to slice neatly.
2. Use a Sharp Knife & Pie Server
Use a sharp knife to cut slices (making sure to wipe the knife between cuts).
A pie server or spatula makes it easier to lift clean slices.
3. Add Toppings (Optional but Delicious)
Vanilla ice cream – This is my favorite and is a classic pairing.
Whipped cream – Light and fluffy for the best bite.
Drizzle of caramel or honey – Adds a different, sweet twist.
Sprinkle of cinnamon sugar – Because why not!
Want to try a different pie recipe?
This elegant perfect peach pie recipe is phenomenal and definitely worth a try after making this marionberry pie! Don’t forget to add a nice scoop of vanilla ice cream to either for the best bite!
You can also go to my pie recipes category to check out all of my different and tasty pie recipes!

Old-Fashioned Oregon Marionberry Pie Recipe
This homemade old-fashioned marionberry pie recipe features Oregon’s famous marionberry baked in a homemade buttery, flaky crust. Use fresh or frozen marionberries for a sweet, tart, juicy filling that makes the perfect dessert for summer or the holidays.
Ingredients
- 2 & ½ cups all-purpose flour
- 1 tsp salt
- 6 tbsp unsalted butter, chilled and cubed
- ⅔ cup vegetable shortening, chilled
- ½ cup ice cold water
- 4 cups (700g) fresh or frozen marionberries
- 1 1/2 teaspoon lemon zest, about 1 large lemon
- 2 tablespoons fresh squeezed lemon juice
- 1/2 teaspoon kosher salt
- 1 cup granulated sugar
- 2 1/2 tablespoons corn starch
- 1 1/2 cups all-purpose flour
- 1/2 cup brown sugar
- 1 1/2 teaspoons cinnamon
- 3/4 teaspoon kosher salt
- 12 tablespoons cold unsalted butter, cut into cubes
Instructions
- Begin to make the pie crust by whisking together all-purpose flour and salt in a large bowl.
- Add butter and shortening to the bowl, and using two forks cut the butter and shortening into the flour mixture. The goal is a coarse meal, do not overwork/overmix.
- Measure out ½ cup of water and add a couple of ice cubes to cool the water down, waiting until the ice cubes are fully melted.
- Drizzle the cold water into the bowl, 1 tablespoon at a time making sure to use a rubber spatula to mix thoroughly between adding water. Stop adding water when the dough begins to form a large clump and do not add any more water than you need.
- Transfer the dough to a floured work surface. Using floured hands, fold the dough into itself until the flour is fully incorporated into the fats. Avoid overworking the dough.
- Wrap the dough tightly in plastic wrap and refrigerate for at least 2 hours.
- Once the dough has chilled for at least 2 hours, split the dough and wrap the other half and put into the freezer to use another time. Lightly flour your work surface and begin to roll out the dough. Roll the dough into a very thin 12-inch circle which should fit a 9in pie pan.
- Using the rolling pin, transfer the disc into your pie pan, trimming the edges.
- Poke holes in the bottom of the pie crust using a fork, then place parchment paper in the center of the pie pan and weigh down with pie weights or beans like I did in the case.
- Blind bake the bottom half, in an oven set to 375 degrees Fahrenheit for 20 minutes.
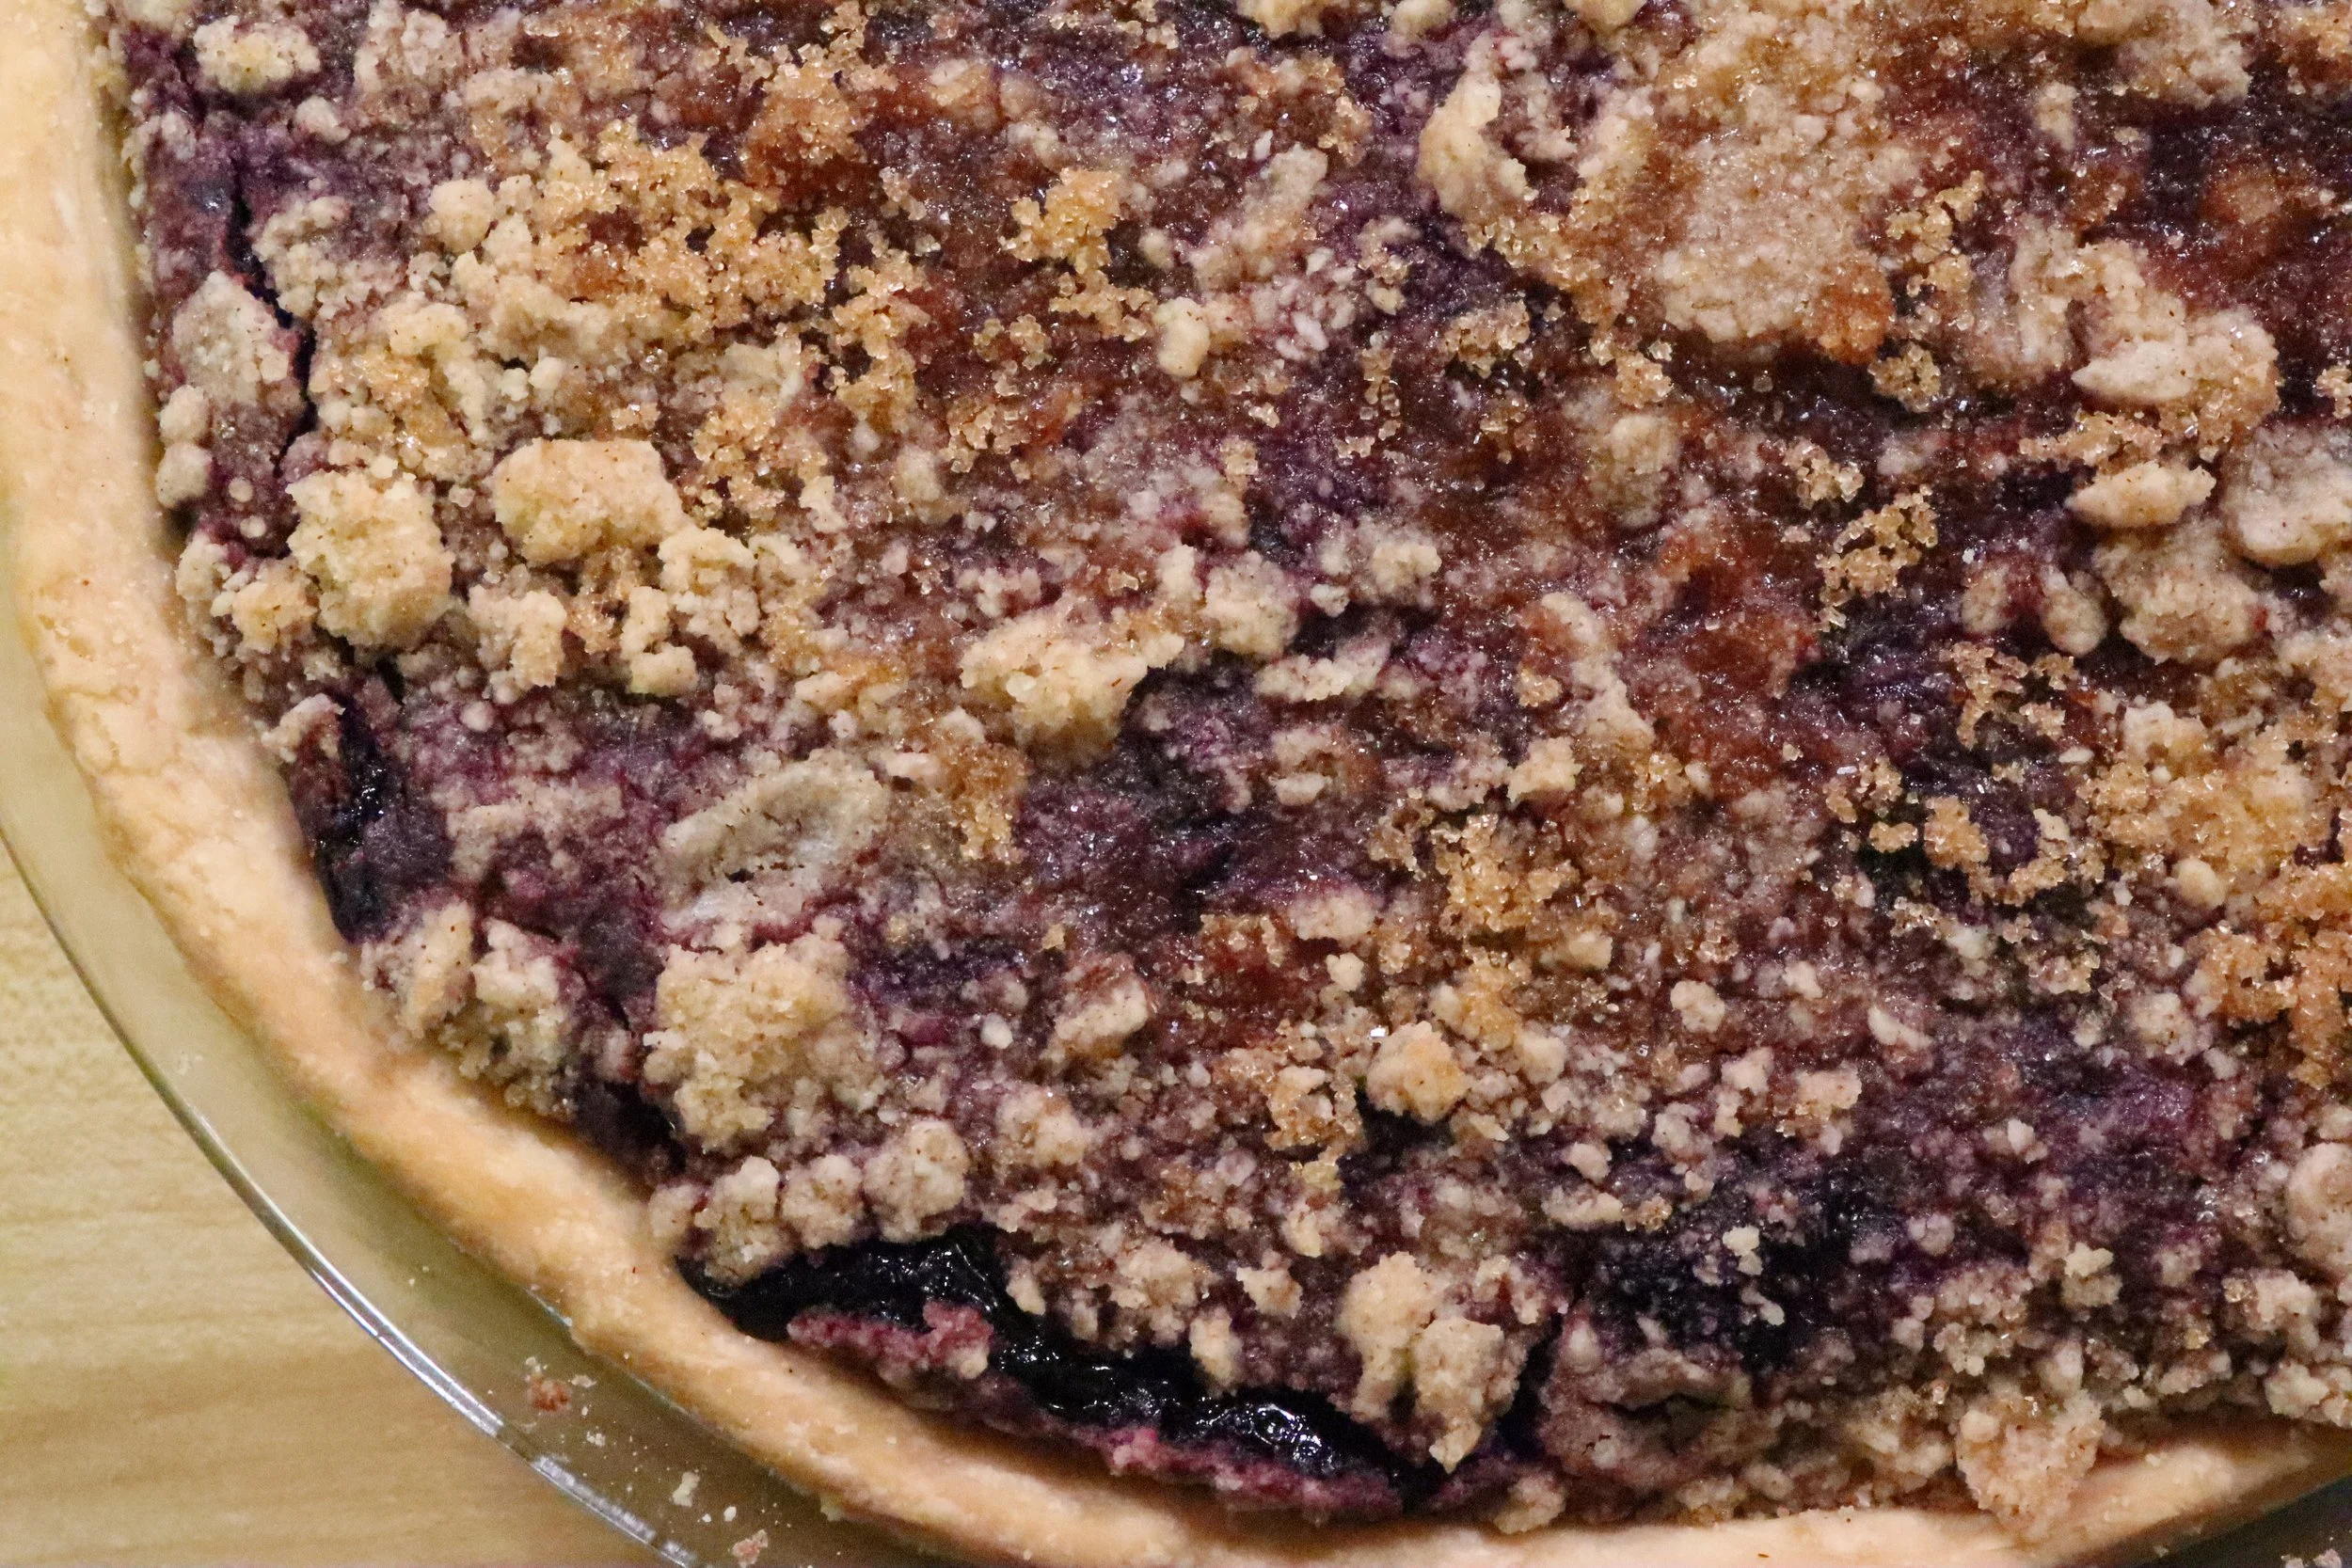
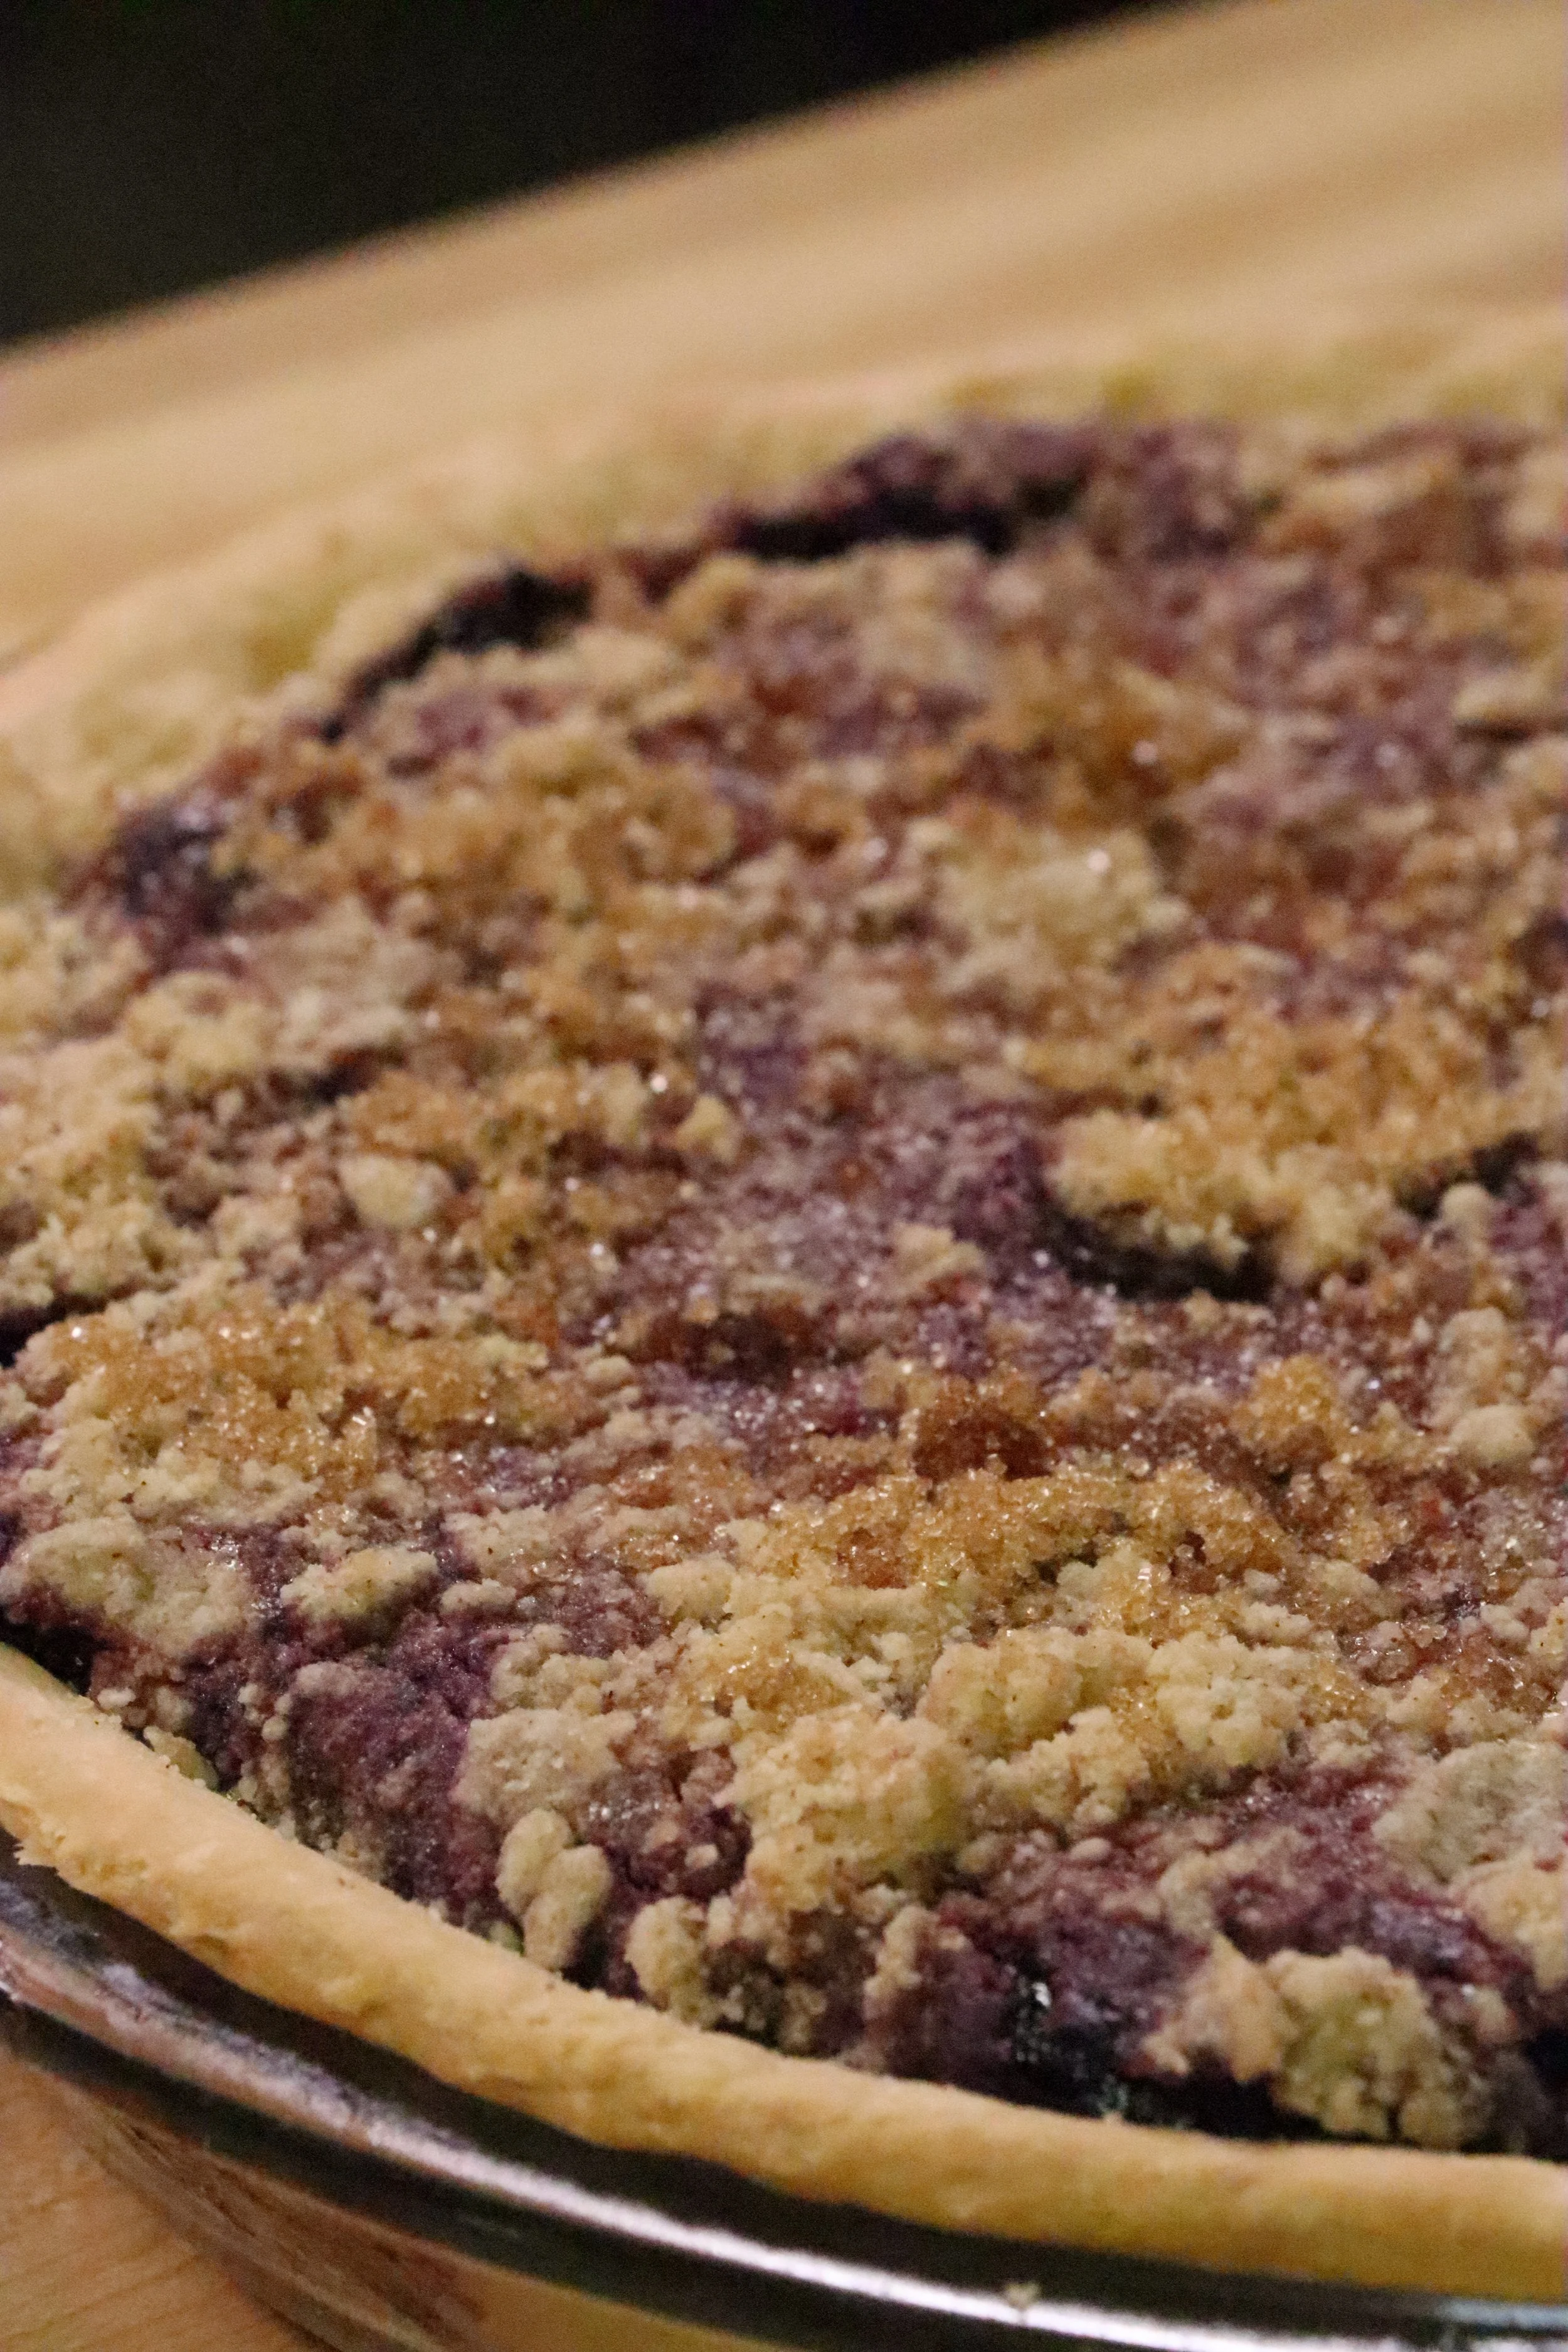
- Take out of the oven and take pie the weights out and put your marionberry pie filling in and level.
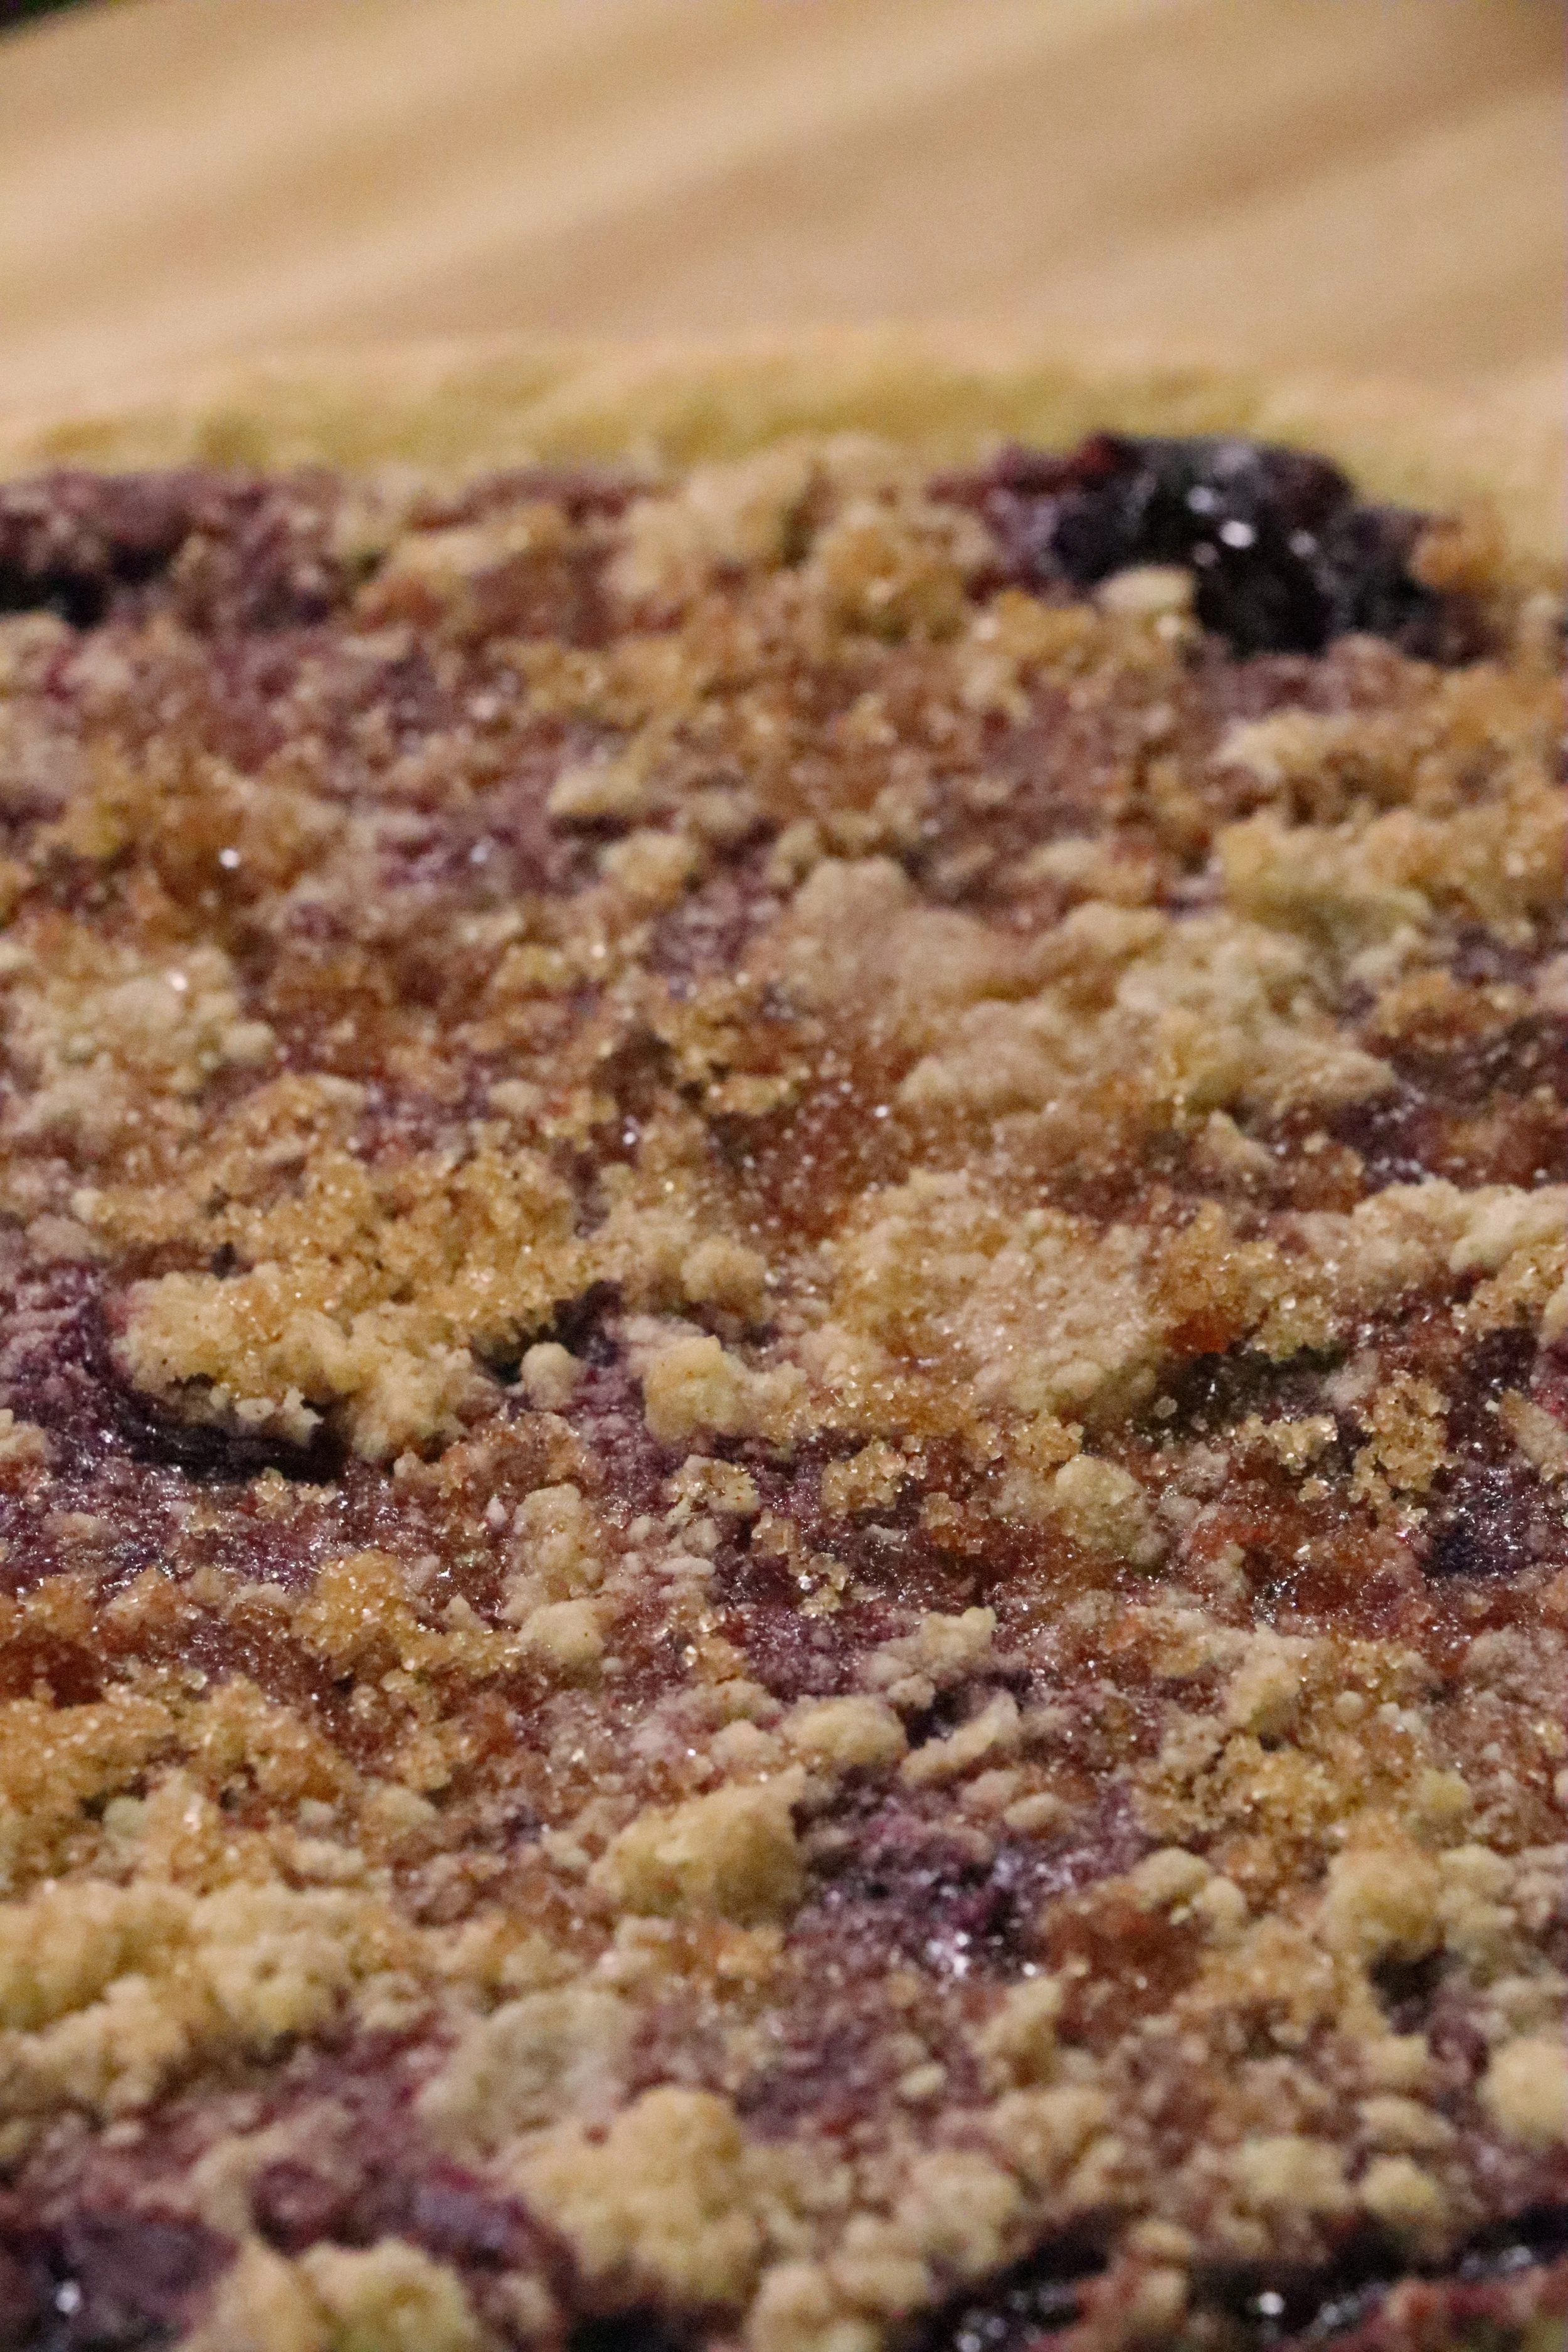
- Using a spoon, sprinkle the crumb topping over the marionberry filling. Optionally top with more brown sugar.
- Place in an oven set to 400 degrees Fahrenheit for 15 minutes then lower the temperature to 350 degrees Fahrenheit and continue baking for another 35-40 minutes.
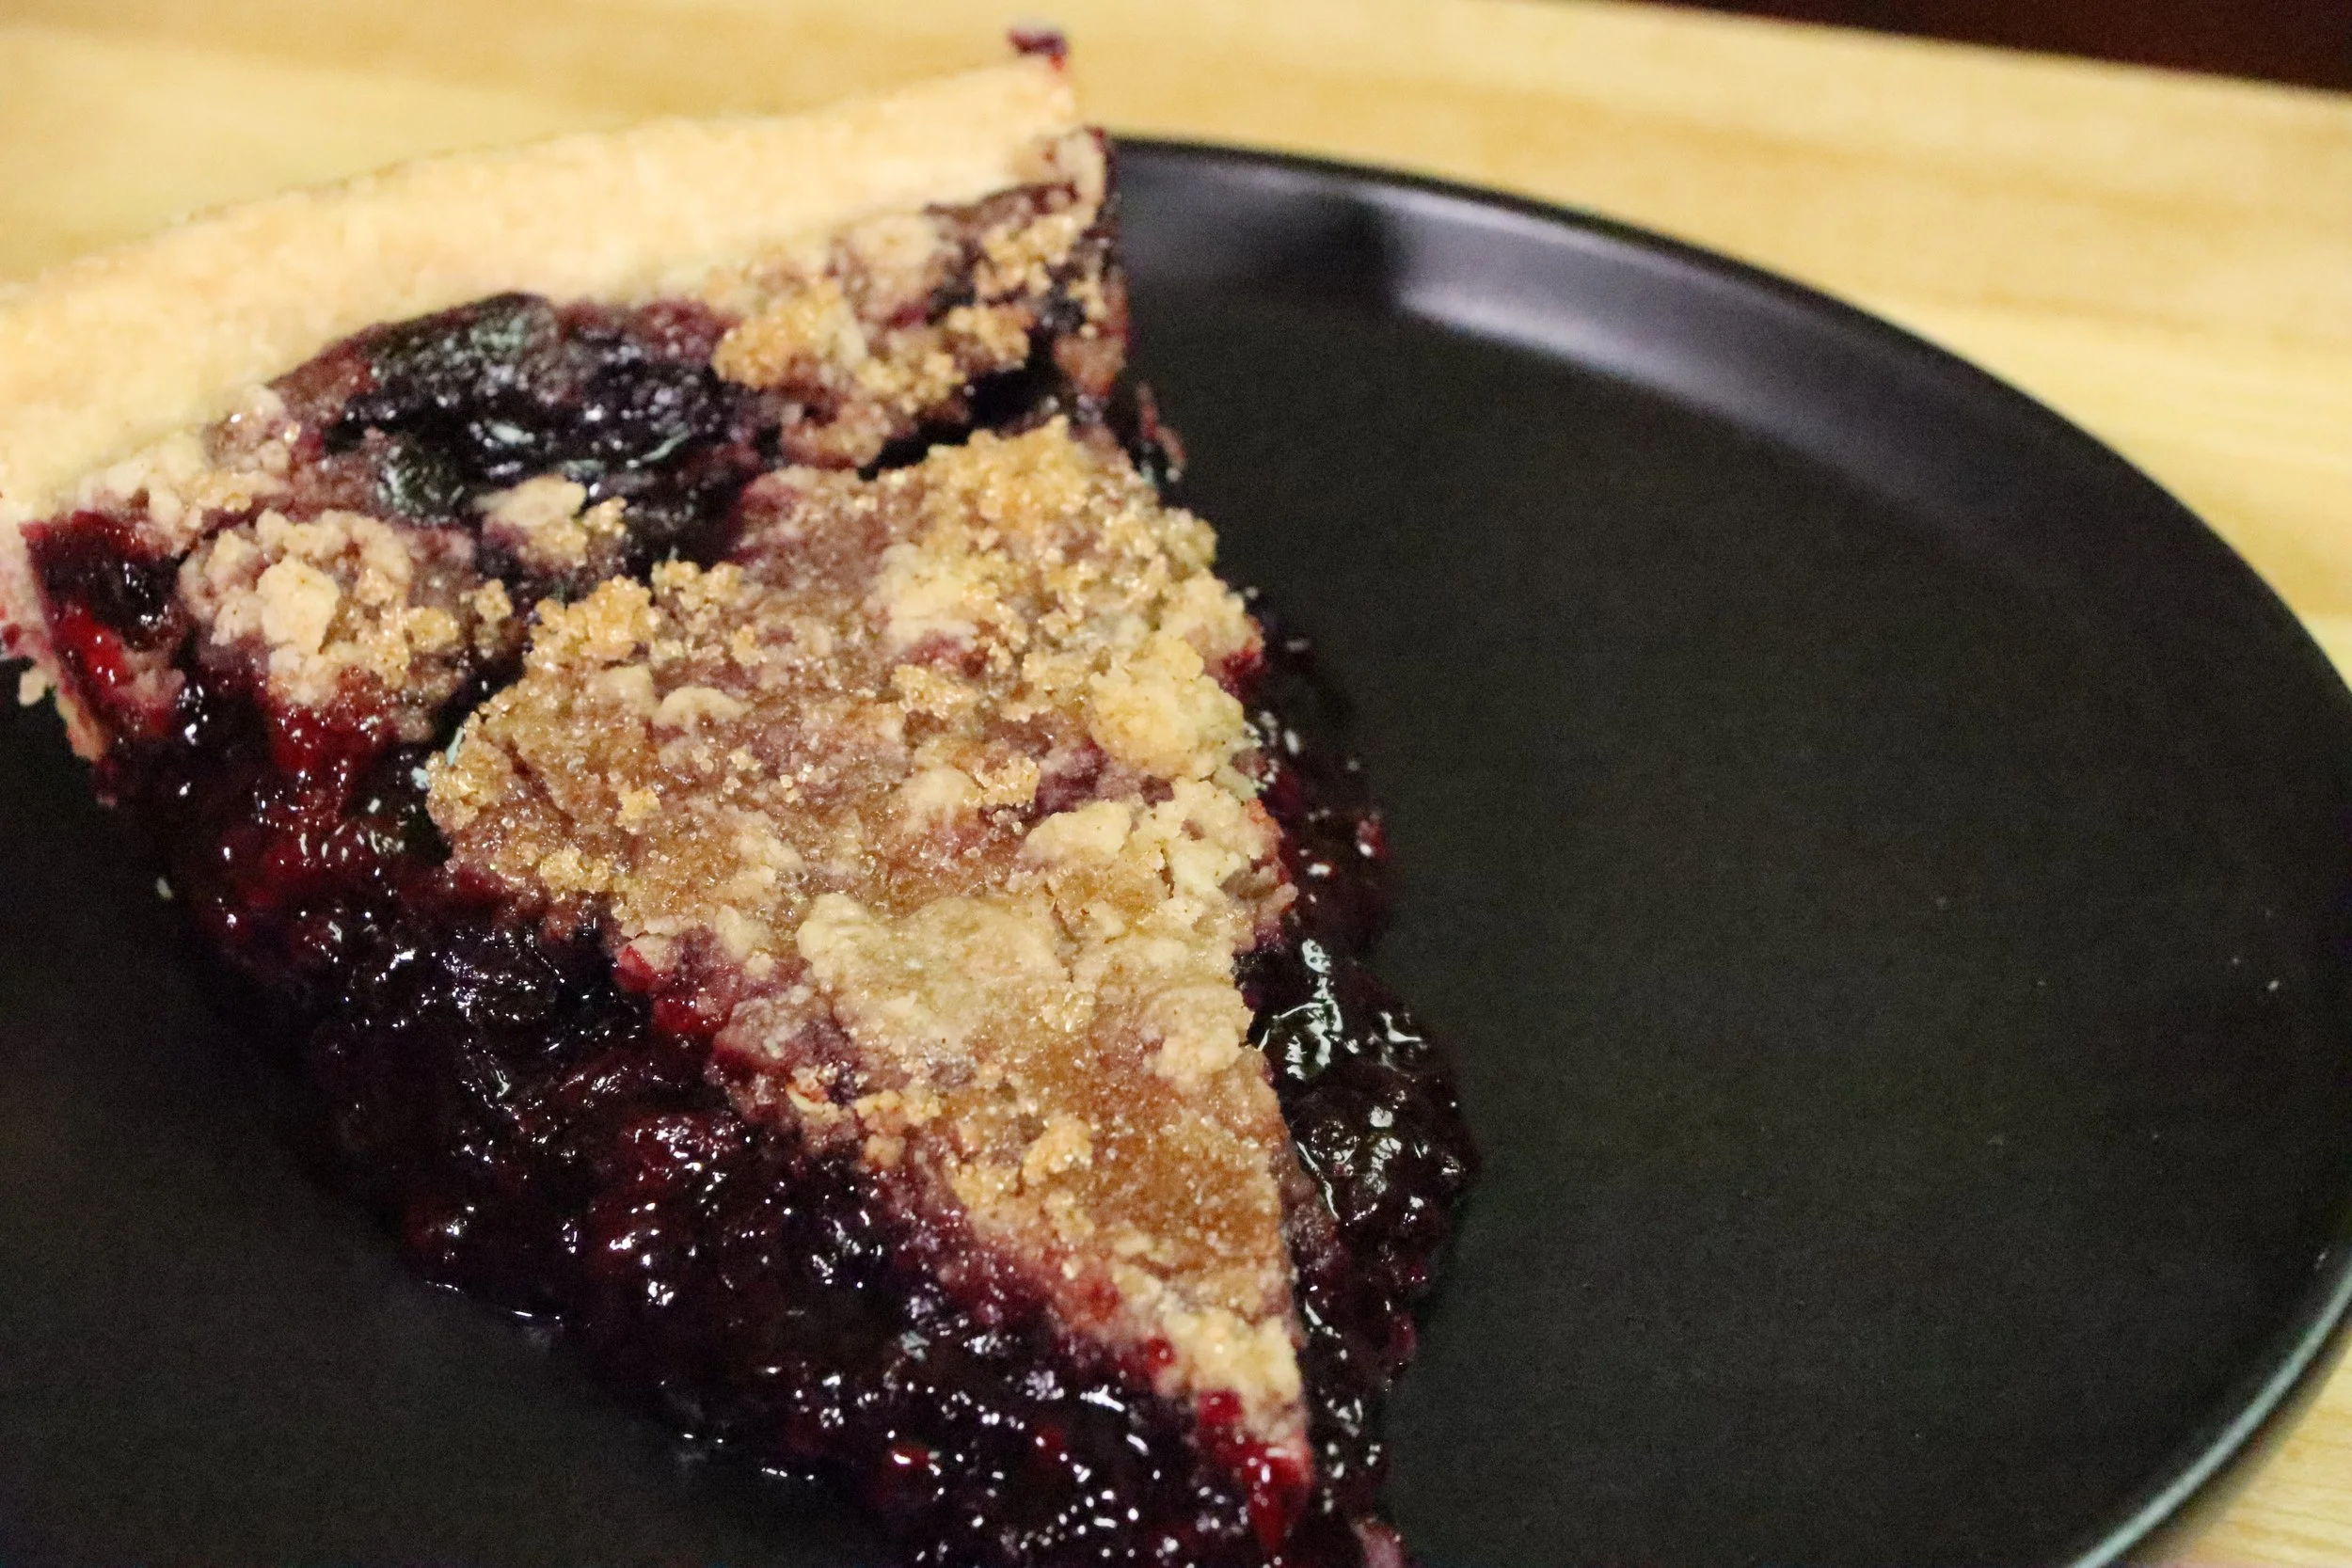
- Let cool for 3-4 hours before slicing and serving.
- Optionally serve with vanilla ice cream and enjoy!
- Whisk together the all-purpose flour, brown sugar, cinnamon, and salt.
- Using a pastry cutter, cut the cut the butter into the flour mixture, until the butter is pea sized. If you don't have a pastry cutter, you can also use a fork or your hands.
- Cover the brown sugar crumble with plastic wrap and put in the fridge until you're ready to use. If you're not using the crumble right away, store in the fridge in an airtight container.
- In a medium saucepan combine the marionberries, lemon zest, lemon juice, granulated sugar, kosher salt, and corn starch and heat over medium heat, mixing often, for 8-10 minutes.
- Take off the heat and let cool for 10 minutes before adding to your pie crust.
Notes
- Corn Starch: I love using corn starch as a thickening agent because it helps create a sturdy filling.
- Serving the Pie: If you want clean cuts when you are serving the pie, place the pie in the fridge for about an hour before serving. This step will help the pie filling completely set and the fruit will stay in place when the pie is cut. For even cleaner results wipe your knife or pie server in between serving slices.


